POCUS Research
Browse our growing literature library of POCUS related research. Each study links to original study.

LUNG POCUS
In the hands of a skilled clinician, lung ultrasound can diagnose most pulmonary diseases with accuracy approaching a CT scan. And it can be done at the bedside, in just a few minutes with zero ionizing radiation. Below is a basic lung ultrasound overview. For more in-depth descriptions and tutorial videos, consider getting The POCUS Textbook.
Lung POCUS Overview
Patient Positioning and Probe Selection
To perform a complete exam, all zones of the lung must be scanned. This will require the patient to sit up or roll to either side. The phased array probe is usually used for lung ultrasound. To evaluate the pleural character and thickness, a linear probe in the anterior lung zones is ideal. For pleural effusions, the patient should be seated upright or the patient's head of the bed should be semi-upright.

With the probe marker toward the head, place the ultraasound probe on the chest, in between two neighboring ribs. In a systematic fashion, slide the probe down, one rib space at a time. Then move laterally and slide up the lung. With each movement, you should redefine your barriers of ribs and identify the pleural line. It is important to remember that in order to see the lung tissue, your ultrasound probe has to be perpendicular to the lung at any given point.
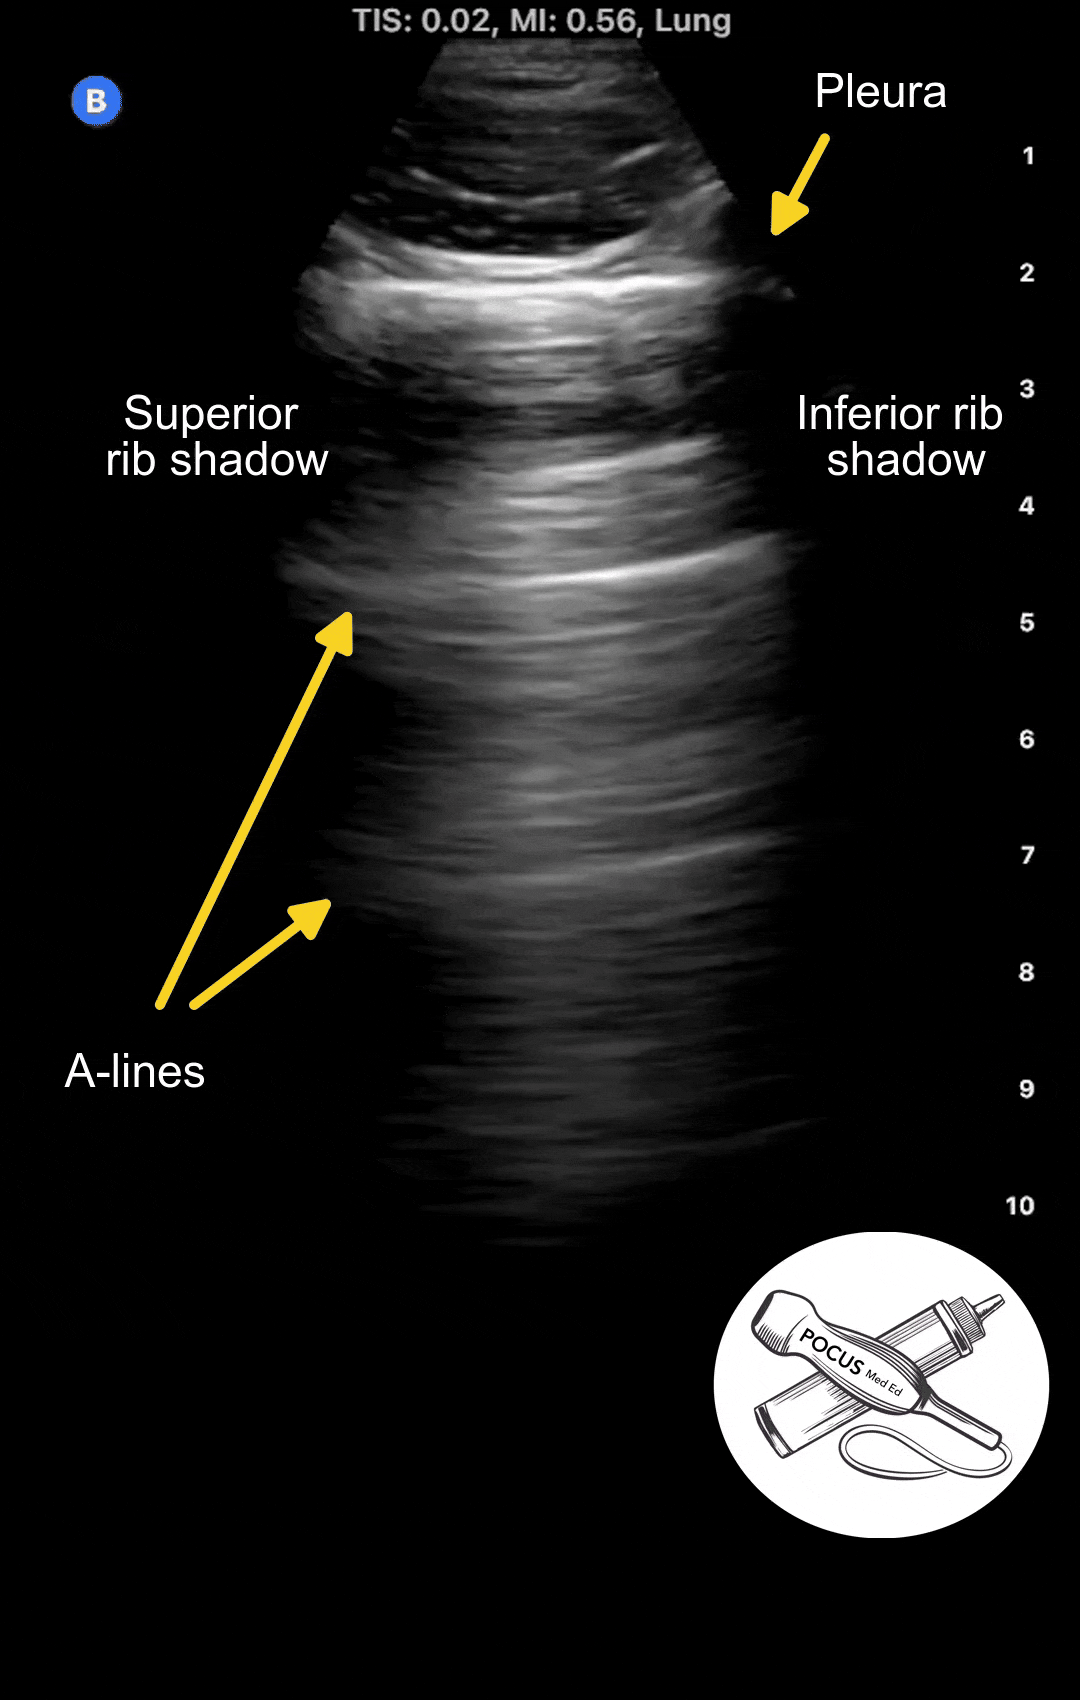
A-lines and Lung Sliding
In a normal healthy lung, you should see a thin, smooth, moving pleura with horizontal reflections at equidistant intervals. These reflections, or ultrasound artifacts, are called A-lines. A-lines are seen in normal lungs and in diseases that do not affect the pleura, such as COPD or asthma.
In the example below, you can see the first bright horizontal line, which is the pleura, shimmering as the patient breaths in and out. Note how thin and smooth the pleura is. The horizontal reflections below it are called A-lines.

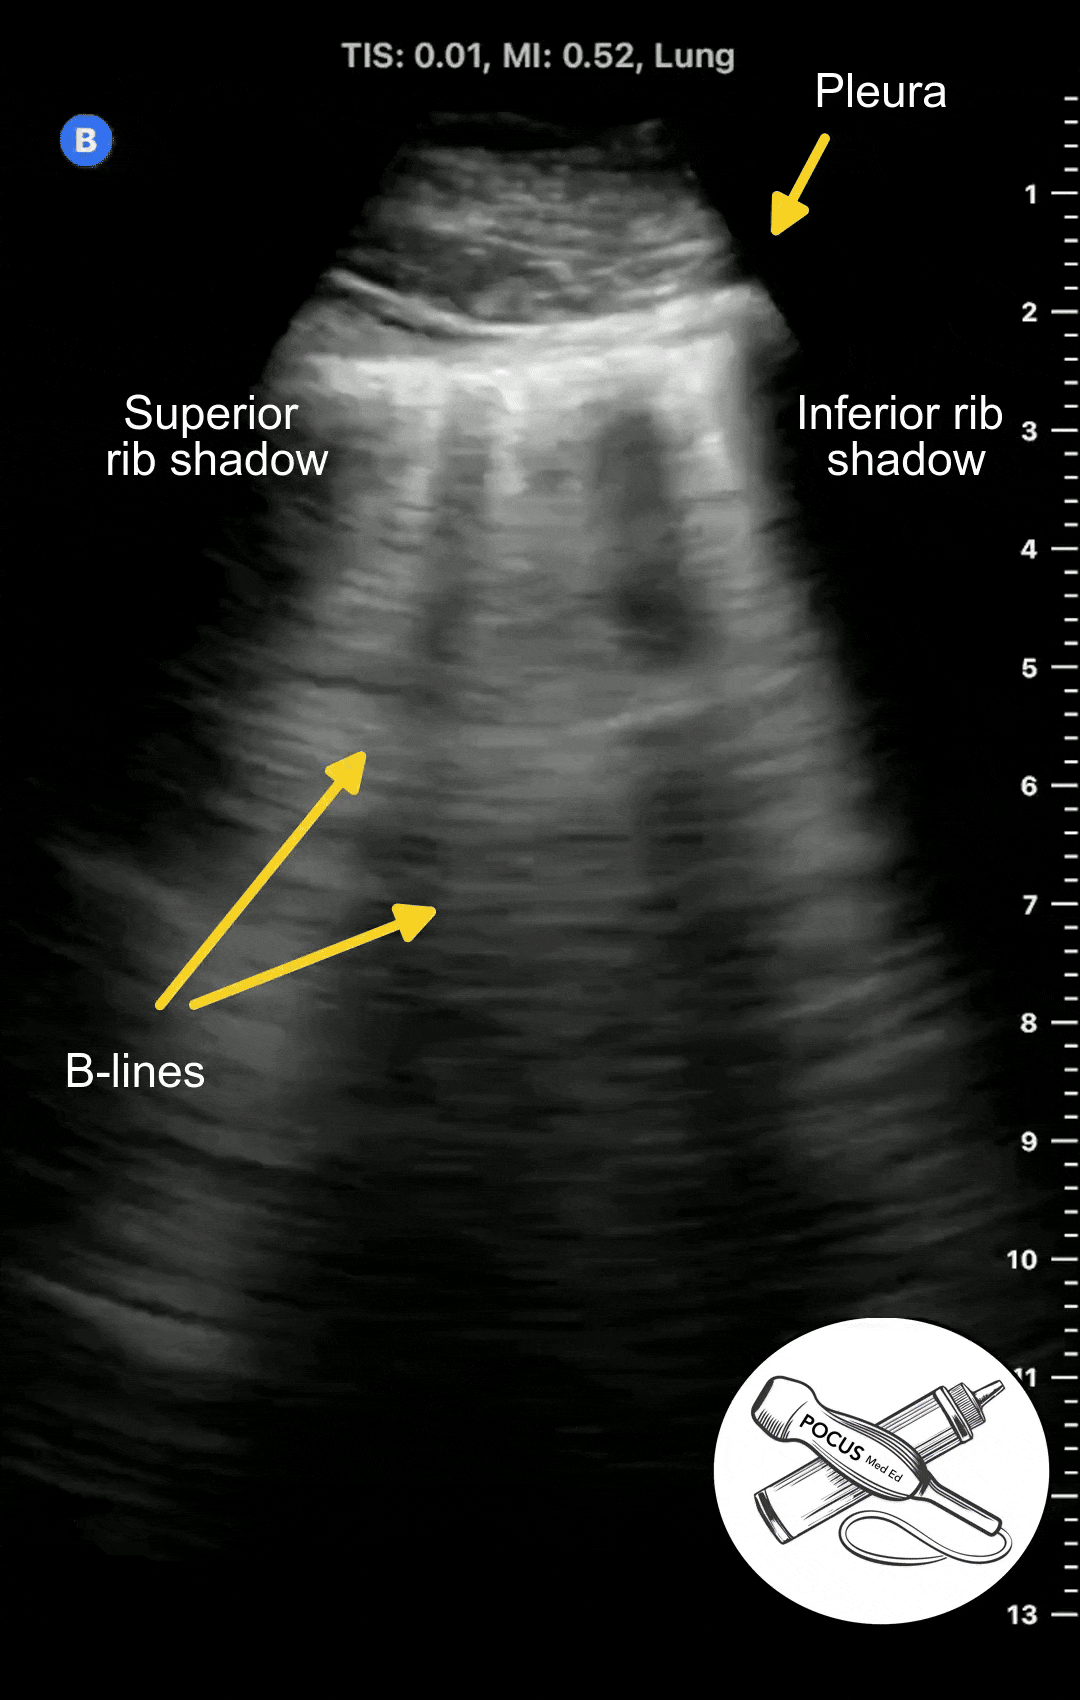
B-Lines
With any disease that causes pulmonary edema, such as congestive heart failure, acute respiratory distress syndrome, or pneumonia, the extravascular lung water can overflow into the interlobular septa and alveoli. This results in a different ultrasound artifact to appear called B-lines.
B-lines are vertical projections that originate from the pleura and hide any A-lines that were previously there. The number of B-lines are proportional to the degree of pulmonary edema. B-lines are considered abnormal if there is 3 or more in a given rib space.
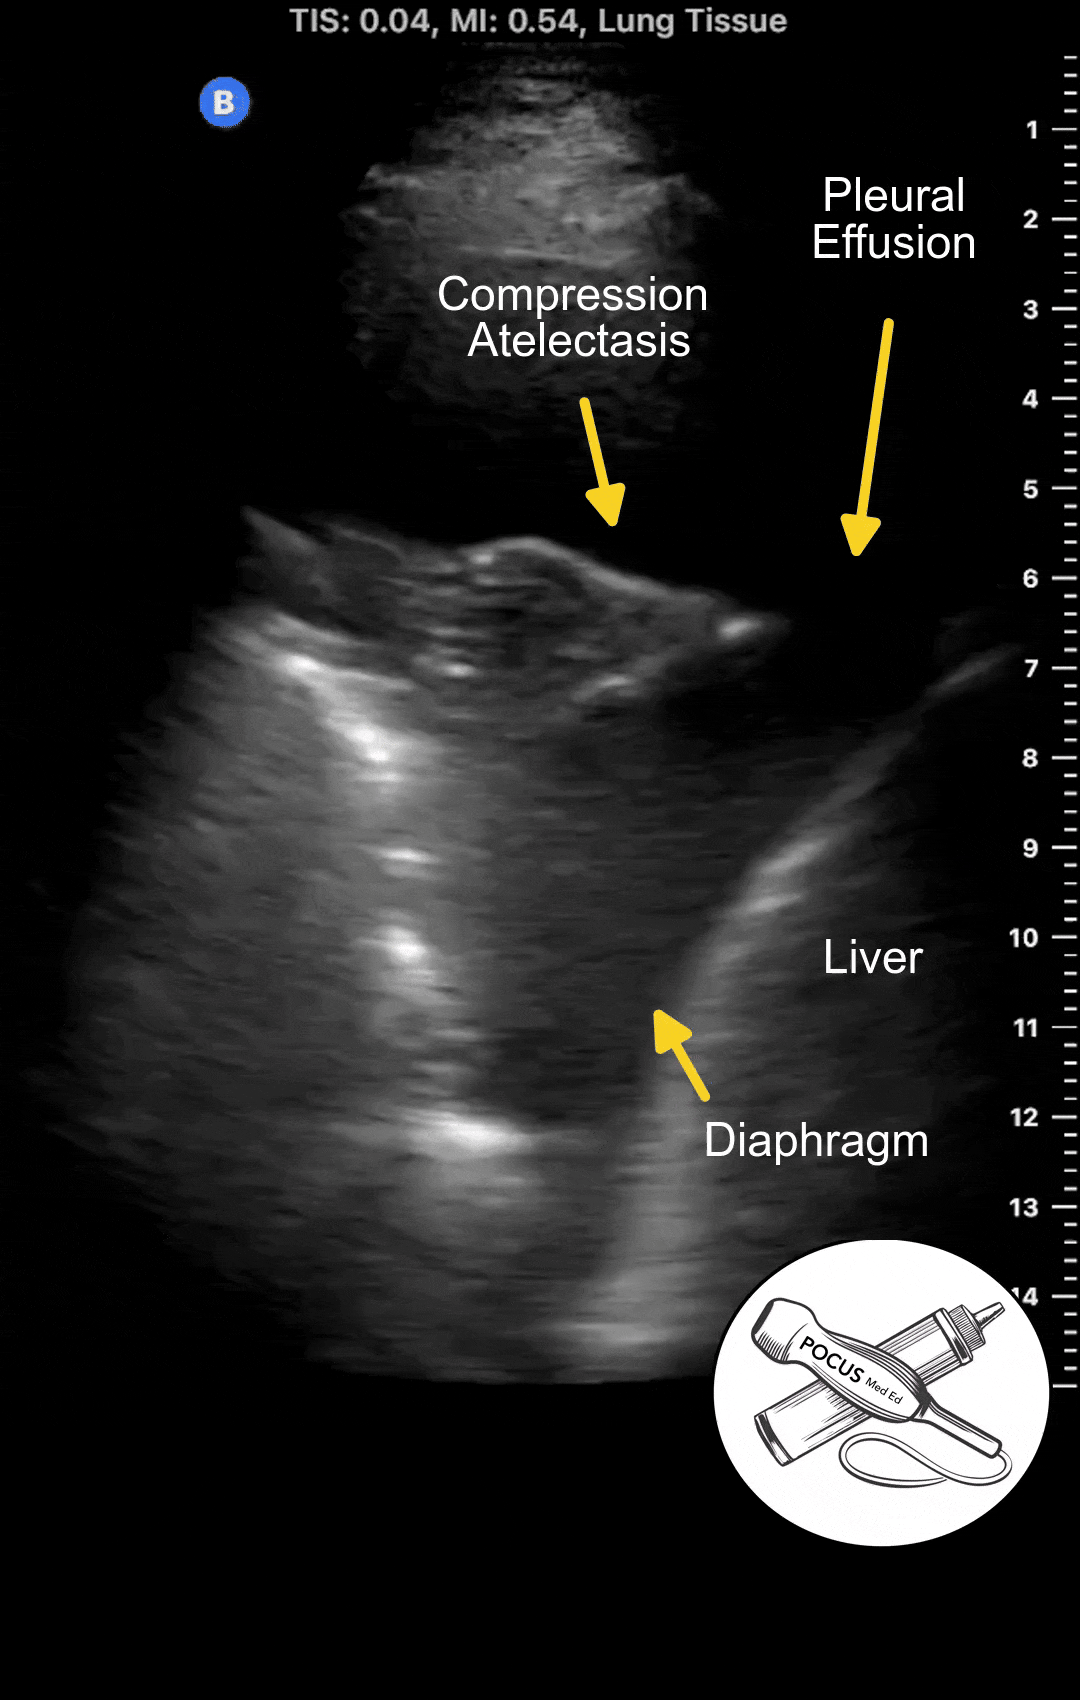
Pleural Effusion
Pleural effusions accumulate above the diaphragm in the most dependent areas of the thorax. Ultrasound is one of the most sensitive methods for detecting them. Ultrasound can detect pleural effusions of 10 milliliters or less and is virtually 100% sensitive for larger effusions, especially when the patient is sitting upright.
The most sensitive position is in the posterior inferior zone just above the diaphragm, with the patient seated upright. The effusion causes compression atelectasis of the lung base, commonly mistaken for a pneumonia based on chest X-ray. Most patients with significant pulmonary edema will have some degree of pleural effusion. If there is a large number of B-lines with absent pleural effusions, other diseases such as pulmonary fibrosis or viral pneumonia should be considered.